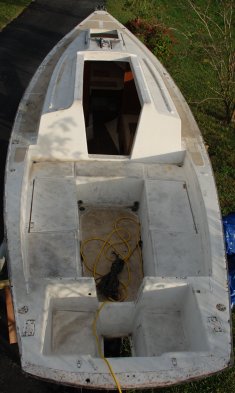
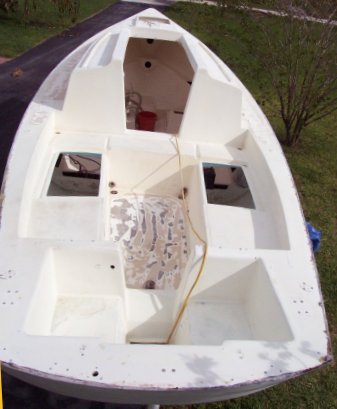
The interior restoration has come to a halt until the deck is restored, because access to the
deck hardware fasteners inside the hull will be more difficult once the interior is completed.
This is a turning point in the reconstruction.
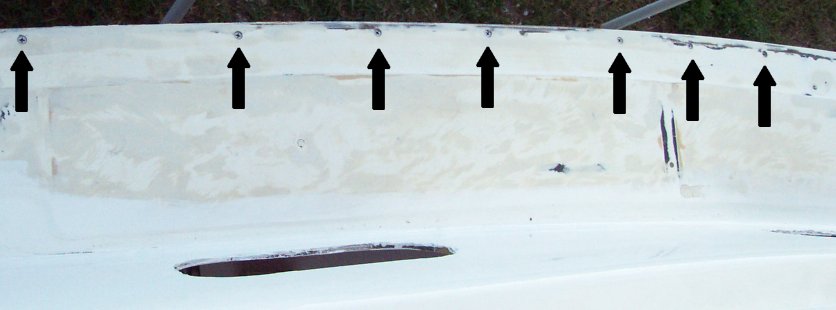
Following the advice of Don Casey, I have decided to replace all of the SS wood screws which Cape
Dory used to join the deck and the hull, with SS machine screws. This wasn't easy to do because
access is sometimes extremely difficult, I'm not as agile as I once was, and I'm working alone.
Still, it didn't take too long or cost very much, and there's no better time than while
the boat is stripped.
There weren't as many as I expected, and they weren't evenly spaced. I assume Cape Dory
relied on the Toe Rail screws to augment these. I found and replaced 33 wood
screws and added a few, for a total of 54 machine screws, which is an average of 12 inches on center.
Each machine screw (head and shaft) was sealed with polysulfide, although in hindsight a
polyurethane sealant/adhesive (like 3M 5200) would have been a better choice since they are permanent.
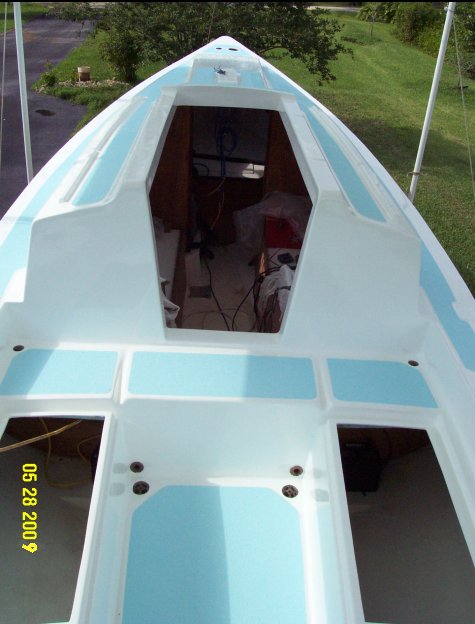
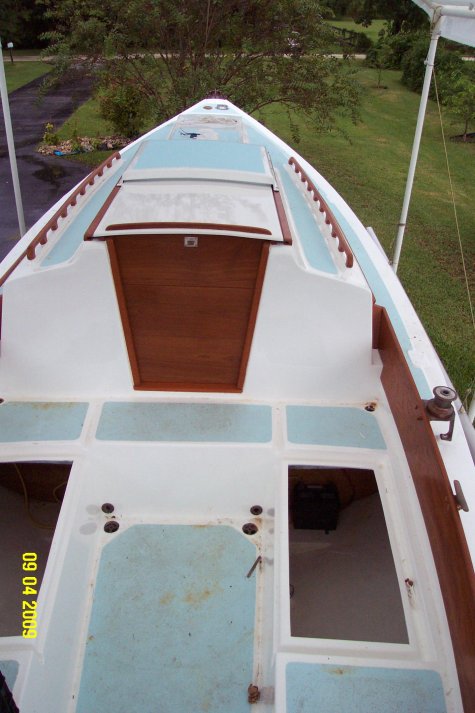
At last, after seemingly endless preparation and persistent South Florida thunderstorms,
I have finished painting the deck. It is done with Interlux Perfection, and Pachena
KiwiGrip non-skid. I am very pleased with the result.
This represents a big psychological step forward, because it allows me to begin re-
installing hardware and the exterior woodwork. I'm finally on the downhill slope.
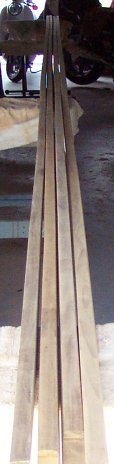
I have begun working on the exterior woodwork. I have built the two toe rails, and the two rub rails. I deviated from the Cape Dory dimensions to beef them up.
Instead of 1 1/8" wide and 1 1/8" tall, they are 1 7/16" wide and 1 7/16" tall with a 8 degree bevel on one side, so they are 1" wide along the top edge.
I took 3 teak boards, 9 1/2' long, and ripped them into 12 pieces. I scarfed the ends with a 5 degree bevel on a router jig, and joined 3 pieces to form
each of the 4 rails, 27' long (more than enough). The resulting scarf joints are just over 12" long.
Here you see the rails before finishing. The scarf joints came out nearly perfect with the router jig, as evidenced in the second photo, where they lie
on their sides to reveal the scarf joints on the side. Each rail has 2 joints along their length.
The top rail shows the 1/16" dado along the bottom edge, to encompass the bedding compound. I will use butyl rubber tape to bed them, as did Cape Dory,
because when I removed the original rails, the butyl rubber was still elastic, functional, and adhering after nearly 30 years.

The exterior woodwork is nearing completion. Instead of replacing the original grab rails, I have fabricated and installed hand rails. The coamings, companionway framing, drop boards, slider rails, and eyebrows, are all done and installed. The toe rails and rub rails are built and finished, but have not yet been installed. The sea hood and slider are installed.
Finally, for the first time in nearly two years, I am able to close up the cabin... but not before my canopy was blown to shreds in a thunderstorm, and the cabin thoroughly soaked inside. This was a good test for the work I did sealing all sides and edges of all wood, particularly the plywood. 'Project Dry Foot' was put to the test also. Both passed with flying colors.
Here, you see the result. She's shaping up beautifully....
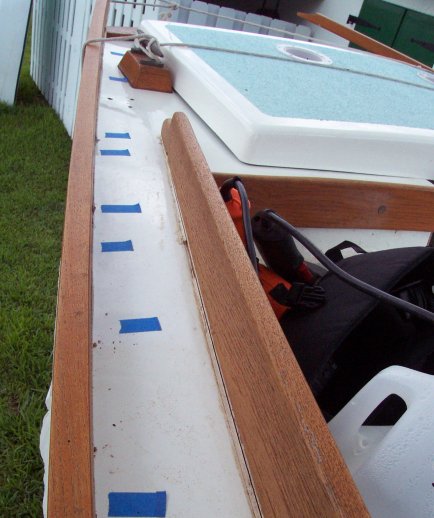
This photo shows the installation of the toe rail. The rail is bedded with butyl rubber tape in a shallow dado on the bottom of the rail. Here, the
pieces of blue tape mark the underlying hull/deck joint screws. I marked these to avoid drilling into an underlying screw when installing the toe rail.
The toe rails were longer than needed, since they were made of 3 pieces of 9' each, for 27' total length. The the rail's overhang at the stern was very
helpful for bending them into place as I went, because I could pull it in or let it out as needed to make the rail conform to the curvature of the deck
as I installed each screw. I'll trim the ends after the rails are installed.
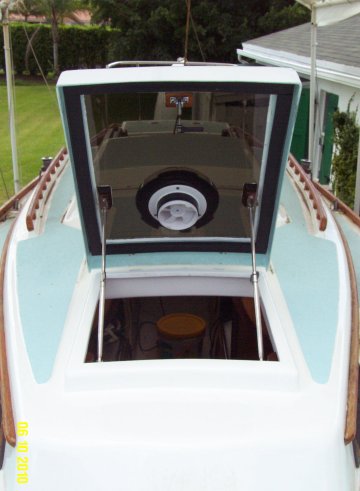
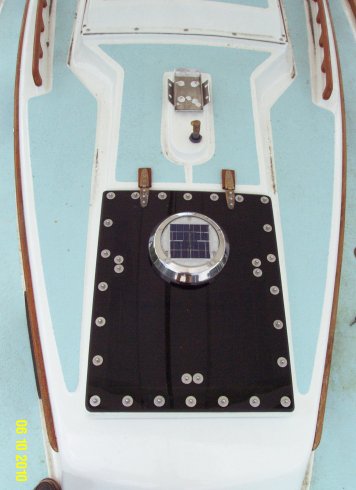
Originally, the center section of the forward hatch was laid up without gelcoat, which made it translucent, in order to admit light into the forward cabin. Unfortunately, without gelcoat, the unprotected polyester saturated fiberglass did not weather well and had deteriorated badly. This photo shows the underlying fiberglass fibers (white patches) , no longer embedded in polyester resin due to environmental degradation. This required correction.

These are photos of the modified forward hatch. I cut out the damaged center section and replaced it by bedding an overlapping piece of 3/8" smoke-bronze acrylic. I then mounted a 4" solar/battery powered Nicro ventilator to minimize mildew in the cabin. Here you see the renovated forward hatch, open (with new gasket) and closed.
With the interior work now completed (is it ever, really?) I have turned my attention to the mast. Originally, the mast was filled with styrofoam packing peanuts to baffle the internal wiring. In the refit, I chose to use closed-cell foam pool 'noodles', which I slid into the mast and ran the wiring through their hollow center.
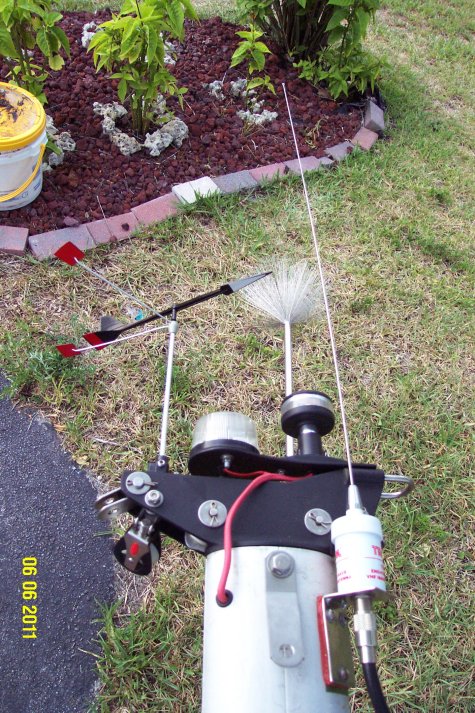
At the top of the mast, I wanted to add a lightning diffuser since I am adding a grounding plate to the hull. I also needed a VHF antenna, and wanted to add a wind vane, an anchor light, and a strobe light. Suddenly, the masthead became a very crowded place, so I had to add an aluminum mounting plate for the lights. The proximity of equipment limited the size of the Windex to their 10" sport model. Good enough.
One question that arose was if all of this equipment on the masthead would interfere with the VHF output power. My brother, Rick, (a lifelong radio expert and my personal hero) brought his test equipment, hooked up all his gadgets, and after tweaking this and that, pronounced good output power with only one watt of reflected power (whatever that is...) All I know is when it comes to radios, if he's happy, I'm happy. Thanks Bro'!
Here is a photo of the masthead. All contact points between stainless steel and the aluminum casting have been coated with Tef-Gel to minimize any corrosion problems.
I ordered wire for the stays and shrouds, cut it to length, and used Hayn Hi-Mods for the fittings. I considered the new rope rigging, but decided against it because I wanted the more classic look of stainless, the rope requires stretching, and I'm not convinced of its longevity in the tropics. I also chose not to have them machine swaged, because I want the hands-on experience of DIY rigging.
Next, I will be raising the mast to check the standing rigging and to finalize the electrical connections at the mast step.